hexagon logo

Probe Calibration and Form Resutls

Can probe calibration affect form results?

Using TP20, 3 way (T-shaped) build. Taking about 50 vector points around a cylinder and constructing a cylinder (least squared). Output cylindricity and it measured 0.0024" yesterday afternoon. Calibrated the probe this morning, re ran the same part and cylindercity measured 0.0011". All the other diameters and distances measured were different by 0.0001"-0.0002".
  • 1) If you're using more than one tip of the star probe for the cylinder, the calibration could indeed cause that (small discrepancies on one tip, could put it out of sync with the other - check your cal results for high StdDEv and/or tip diameter). As someone else mentioned, a graphical analysis might show hits with one tip to be causing the issue.

    2) How big (diameter and length) is the cylinder? 50 hits often seems a lot, but when looking at form you might be getting an incomplete picture. Especially if you're not taking the hits in the exact same locations.

    3) The TP20 will exhibit lobing anyway, depending on the length of the build I'd expect 0.005-0.015mm so some of your error might come from that.

    4) The normal (Std/Med/Ext) force module aren't really designed for star / T configurations. You can get 6way modules that are (but really I try avoid star probes on TP20s)


    In actuality, I'd say it's probably a combination of the above. Have you checked the repeatability (not moving the part) and without recalibrating?

  • the 0.0013 is in inch not millimeters. The 0.0013" is in fact 0.033mm which is a lot to have as variation for cylindricity.
  • Ok I understood now your pov.

    Thank you.
  • @constadin
    yes but not for the TP20. in my experience when it comes to checking diameters with the TP20 , the less hits the better. The TP20's spring just doesn't allow it to get great measurements when checking anything over 8 hits.
  • In the past, without removing the part from the CMM, the results are repeatable. The diameter of the cylinder is around 8 inches and is about 7 inches long. So the axis of my cylinder lays on my 454s Y axis. I can't fulling reach all the way around the cylinder so I move as low as I can go to maximize the spread of points. Using an extended force module and cal results are usually always under 0.0004" std dev.
  • Calibration can absolutely affect the form when using multiple styli to determine one shape.
    As can residue, dust, oil, or any other FOD on the parts, cal sphere, or any of the 3 styli tips.
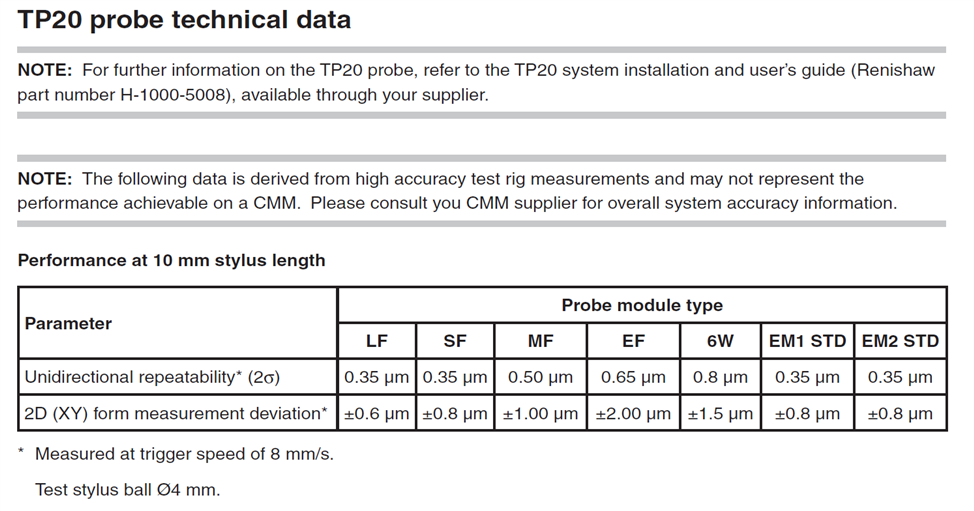
    Depending on your probe length and weight, TP20's SF should be able to reproduce with 1.6um variation per the brochure
    (these are from Renishaw "Data sheet_TP20-MCR20_EN.pdf", Issued 0505 Part no. H-1000-2064-02-B)

    Haaha notice TP20 is being probed at 8mm/sec probe speed, THAT'S FAST!!! I was always told 2mm/sec for TP20.
       ​​
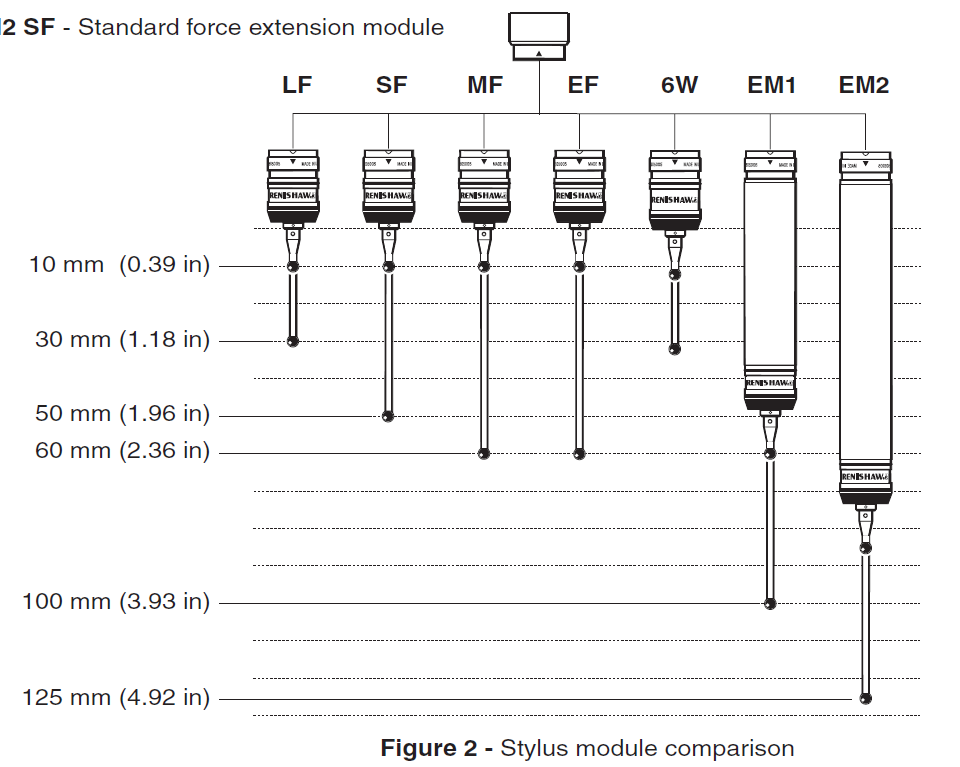
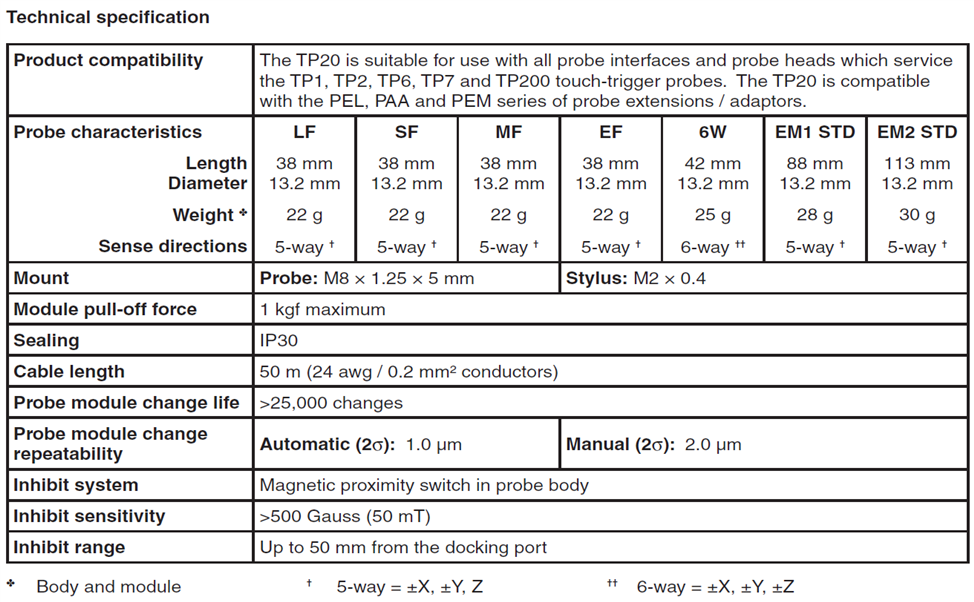
  • This is from Renishaw's TP20 User's guide (H-1000-5008-04-C)


  • 4) The normal (Std/Med/Ext) force module aren't really designed for star / T configurations. You can get 6way modules that are (but really I try avoid star probes on TP20s)


    In actuality, I'd say it's probably a combination of the above. Have you checked the repeatability (not moving the part) and without recalibrating?


    ^ all this. the TP20 is a limited probe. you've got to find the sweet spot.
  • Using an extend force, 20mm ext, 5 way, tip1 3x20mm, slot 2 tip2 3x20mm, slot 4, tip 3 3x20mm.