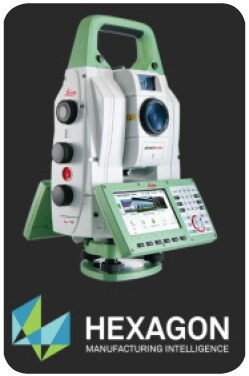
Leica Total Station

This guide may be used for initial configuration, connection and basic operation of the Leica Nova and Viva Total Station within Inspire. For more details on instrument operation and configuration, please contact Leica Geosystems directly.
License Requirements
In order to gain full total station integration with Inspire additional licenses must be purchased from Leica Geosystems and loaded on the instrument. Optional licenses include:
• Virtual GeoCOM. Used for wireless communication and control.
• GeoCOM robotic. Which enables remote pointing and robotic control of the total station from Inspire.
• GeoCOM imaging. Which enables image capture and display within Inspire.
• GeoCOM video. Which enables live video display within Inspire.
• Scanning. Which enables the MS60’s scanning functionality.
Hardware Setup
Set up the unit following the manufacturer’s directions. Leica total stations may be connected either with a USB cable, wireless network adapter or Bluetooth connection. Ensure that you have the necessary cables, router or a Bluetooth adapter. Be sure the power is turned on and the battery is charged.
Configuring the Instrument for Optimal Use with Inspire
2. Check that the Hz angle display is set to North anti-clockwise and the V angle display is set to Zenith angle. This will ensure that the angles displayed on the instrument match those of the recorded points in Inspire.
Software Setup
It is recommended that initial connection and testing be performed using a cable connection to your computer. To connect directly to the PC, you will need to install the instrument drivers. The current drivers Inspire supports can be downloaded from http://www.kinematics.com/ftp/SA/Install/Driver%20Downloads/TotalStations_Theodolites/Leica/Leica%20Nova%20MS60%20Drivers/.
To use the live remote video function available on this instrument, you will also need to install the VLC player application which can be downloaded from http://www.videolan.org/vlc/. Once installed, a Video button will appear on the Camera Interface dialog.
Direct Cable Connection
On the instrument select Settings > Connections > All Other Connections. Set the GeoCom connection to USB (to obtain the current IP address and port, press Cntrl..). Connect the USB cable and proceed to the connect the Instrument.
Wireless Connection
A connection can be established to the Nova by adding the device to a preexisting network or by building an Ad-hoc connection with your PC. For more detailed instructions, refer to the document “Connecting a Nova total station with a PC using a WLAN” on our download page. For a quick synopsis on a Windows 7 machine, follow these steps:
Building an Ad-hoc Connection on a Win7 PC (Win10 does not directly support Ad-hoc).
2. Select Setup a new connection or network > Set up a wireless ad hoc (computer to computer) net- work.
3. When prompted, enter a network name (e.g. “Ad-hoc MS60) and a security type, if desired (no au- thentication, WEP and WPA-2 are supported).
5. Set the IP address to be compatible with the instrument.
Setting the IP Address in the Adapter Properties for the Instrument
2. Select Manage wireless networks > Adapter properties for the network you wish to connect to and for editing the properties of your ad-hoc network.
3. In the Wireless Network Connection Properties dialog, select Internet Protocol Version 4 (TCP/IPv4).
4. Select Properties and enter the IP address rather than obtaining one automatically. This address
determines the computer’s IP address on the network.
5. On the instrument select Settings > Connections > All Other Connections. Set the GeoCom connec tion to WLAN (to obtain the current IP address and port, press Cntrl..).
6. Continue to the section Running the Instrument.
Connecting to an Existing Wireless Network
2. Click on WLAN Settings in the taskbar and select the network you wish to connect to from the net work list and click Connect.
3. Once connected restart the LeicaCaptivate application.
In some cases, you may need to set the IP address manually by doing following:
2. Select Enable, and then Properties.
3. Choose Specify an IP address, and enter the IP address for the total station on the network. The first three numbers of the IP address need to match the first three numbers entered for the PC. The last number must be unique from the PC.
4. Return to the Windows CE desktop, click on WLAN settings in the taskbar. In the Wireless Informa tion tab, select the ad-hoc network that you created and select Connect.
5. On the instrument select Settings > Connections > All Other Connections. Set the GeoCom connec- tion to WLAN (to obtain the current IP address and port, press Cntrl..).
6. Continue to the section Running the Instrument.
Connecting to Bluetooth
1. On the instrument, Select Instrument > Connections > All Other Connections.
2. Set the GeoCom connection to TS Bluetooth 1.
3. On your PC, go to your Bluetooth adapter and select Add a Device.
4. Select the device from the available Bluetooth connections and select next.
5. When prompted, enter the pairing code: 0000. Once connected, a COM port number will be as signed and can be accessed through the properties of the device.
6. Continue on to the section Running the Instrument.
