hexagon logo

Calibration. Different results

I greet you all, colleagues.
I have a small problem that tends to come and go when calibrating angles. I work with many styli and use a 9-slot magazine for this. Each stylus has about 10 different angle positions. When I did the calibration, two angles on different probes were out of tolerance. One probe has a CM25-2 probe and the other CM25-3. And at the same time, PSDMIS accepts the calibration result without asking the operator. The next day I did a similar calibration and the result was OK.And always out-of-tolerance angles equal to A90 or more than A90 It is very strange . I have been working in this mode for 3 years and there were no such problems. And this year it started. I check the probes visually and do the cleaning before each calibration the same way always. What could be the problem ?

Attached Files
Parents
  • I greet you all, colleagues.
    I have a small problem that tends to come and go when calibrating angles. I work with many styli and use a 9-slot magazine for this. Each stylus has about 10 different angle positions. When I did the calibration, two angles on different probes were out of tolerance. One probe has a CM25-2 probe and the other CM25-3. And at the same time, PSDMIS accepts the calibration result without asking the operator. The next day I did a similar calibration and the result was OK.And always out-of-tolerance angles equal to A90 or more than A90 It is very strange . I have been working in this mode for 3 years and there were no such problems. And this year it started. I check the probes visually and do the cleaning before each calibration the same way always. What could be the problem ?


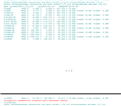
    I see what you mean. Those are some odd results. I see that the standard deviation looks really good for all angles, but somehow the probe radius deviation varies at different angles. It is like the results say that the CMM is very certain that the probe radius is different at different angles. That makes no sense.

    If the standard deviation were larger I would suspect that you have worn spots on your stylus or something is loose, but that is not the case.

    My next guess is that your SM25 module is wearing out, but based on the names of your probes, it looks like you are having the same problems with both a SM25-2 and SM25-3 module. If that is so, it would rule out the module as a problem.

    Maybe there is a problem with the SP25M probe body itself. Make sure the optical window is clean and use some cleaning putty to clean all the magnets and kinematic contacts. Something may be causing the modules to rock a bit when the probe is at an A90+ angle.

    It is also possible that your probe head is getting worn out at some angles. I don't have any suggestions to troubleshoot that other than to try a different probe head, but you probably just have one. Maybe you can at least check for loose fasteners.

    While you are at it, check that the qualification sphere has not come loose on it's mount. Also check all the probe/styli connections. Probably not the problem, but doesn't hurt to check.

    It might also give you clues to create a quick measuring routine to measure the qualification sphere with lots of hits using different probe angles. You can review the diameter results to check if you get different diameter measurements with different angles. Also, you can graph the roundness to see if the problem is just with certain hit vectors. That might reveal a problem.

    Good luck. I hope the problem is something easy/simple.

  • I compared 4 calibration reports from this year in different months. My reference sensor has stable deviations from EFT (X -0.005 Y - 0.078 Z-0.264) Stability indicates no problems, but is the deviation on the Y axis and especially on the Z axis too large? I don't understand what this deviation means? I assume that on the main probe, the XYZ THEO and XYZ MEAS coordinates should match and be the same? What do these deviations say?
Reply
  • I compared 4 calibration reports from this year in different months. My reference sensor has stable deviations from EFT (X -0.005 Y - 0.078 Z-0.264) Stability indicates no problems, but is the deviation on the Y axis and especially on the Z axis too large? I don't understand what this deviation means? I assume that on the main probe, the XYZ THEO and XYZ MEAS coordinates should match and be the same? What do these deviations say?
Children
No Data