hexagon logo

Verisurf

Anyone running verisurf on the cmm or equator? Pros cons?

My company is not loving or believe pcdmis is giving correct data. I hear at least 3 times a day math is math and pcdmis is not doing the math correctly.
  • something...
    We're looking at Verisurf for our two Globals.
    I'm evaluating Verisurf from the reverse of the OP's question.
    I (somewhat) understand and trust the math that The Demon does behind the scenes.
    We have no idea how Verisurf juggles the numbers.

    I'm surprised at how little discussion there is around the webs about Verisurf.
    Good, or bad, I would expect to find more given the software has been around 15 years now.
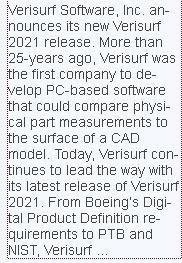

    interesting enough, this software has been talked about 'over there' recently, and Verisurf is claiming to be the FIRST PC-based CAD-based inspection software out there.

    Yes this snippet is from 2 years ago, but 2 years ago PLUS the 'more than 25-years-ago' adds up to 'more than 27 years ago'.
    27 years ago, I was using Pcdmis V3.25 (DOS, PC, Cad-based, in 1996) and another member stated he saw a demo of Pcdmis in 1992 (31 years ago), PC-based, Cad-based.

    So, what do they mean 'more than 25 years ago' (27 since it is a 2-year-old release)? 31 years ago is more than that. (Wilcox & Pcdmis) or is this just more snake-oil salesmenship on their part?


  • I hear this all the time and it gets frustrating really fast. First thing I do is go to the CMM and clean everything. Scales, rubies, probe modules, CMM head, the granite and the mesuring part. Then I calibrate the probes and make sure the standard deviation is as low as possible. Then I look at the program and make sure all my nominlas and vectors are correct and hadn't drifted. Then I re run the same parts and see if the measurements changed. If they changed it due to dirty CMM/probes/needed probe calibration kind of issues. IF they say the same more or less, I say all the time what KatmandudaMeow said "the numbers don't lie".

    I recently had a scenario where this machine and operator were running parts and hadn't scrapped anything in over 3 weeks. Running 1 shift and he's training another machinist. The split up and go 2 shift with the second guy running on his own at night. Night guy runs passing parts all night. Day shift guy comes in the next day and looks at the night guys last part to make his adjustments. Day shift guy runs is first part and critical depth is out of tolerance by 0.005". He told me the CMM is wrong because the last part run was close to nominal.

    I did what I mentioned in my first paragraph and the part measured the same. Numbers don't lie. He said it was the CMM. I then take the same part to another CMM which is a duplicate CMM, same head, model, etc. and guess what. The deviation was different like 0.0002" so yeah, the part was way out of tolerance. BOOM. Either he didn't index his inserts or the CNC cooled off to much or CNC drift or whatever. It wasn't the CMM.

  • classic example of my CNC machine cuts material better than your CMM can measure accurately.
  • I like to remind CNC guys that "If you cant trust it when it says your wrong, you cant trust it when it says your right".
  • Verisurf cant handle many difficult GD&T call outs like the demon. It is not as good as the demon in many ways
  • I like to use the "yeah I machined it with my 3mm ruby tip" in a really sarcastic way.