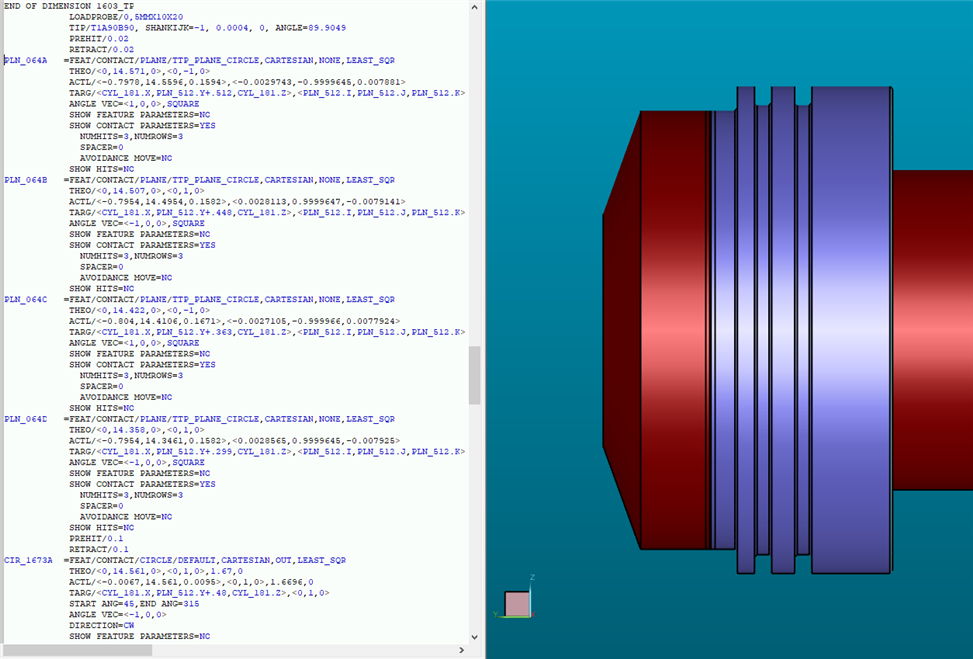
i've got .064" tip grooves that were machined before the tips were straightened for true position. of course i'm having troubles with the parts running on the cmm. the plane circle path of the slots making most of the trouble...
i've tried to tie the groove circle plane target locations (x,y,z) and rotations (i,j,k) to previously probed features. PLN_512 (used for the Y location) is the back side of the tip (right side in the pic) and CYL_181 (used for the X and Z) is the adjacent cylinder (just to the left of PLN_512).
it doesnt seem to be working as well as i'd hoped. the probe still occasionally contacts the side of the slots when probing the circle planes for the slot both when approaching the part and when moving from one touch point to the next indicating the Y axis math is not being done and/or the circle path is not canted with the same IJK as PLN_512.
am i missing something?

