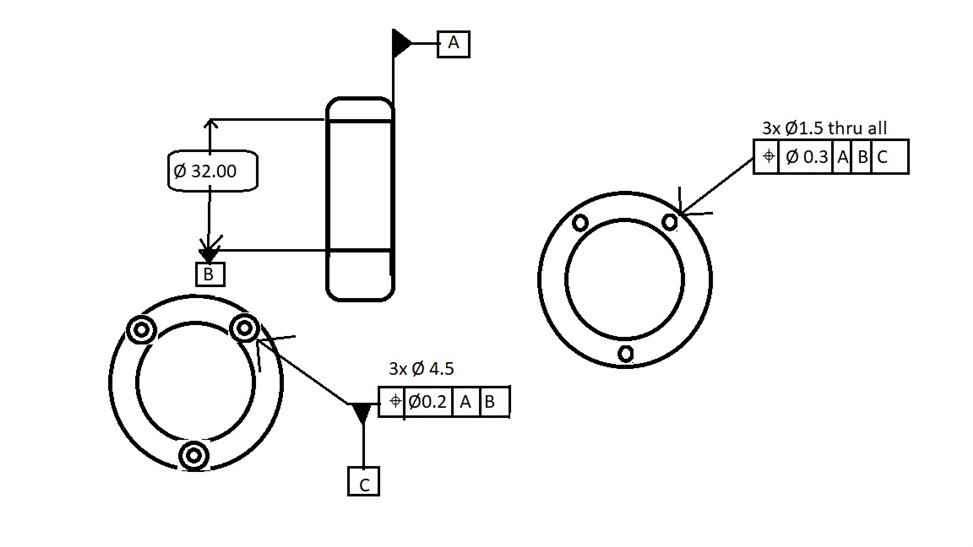
 Please excuse the crude drawing.
I'm having an issue checking postion on the FCF on the right side of the drawing: 0.3 A | B | C
It's a cylindrical part with three drilled through holes and 3 counterbores on one side, with holes that are offset to the counterbores; they are not centered to the counterbores.
If i'm interpreting the datums right, A is one flat side of the part, B is the center of the main bore, and C is the center of the counterbore.
When I measure everything and report position, the report shows i'm 22mm or so off in the x, and 79 total mm out of position. It seems like it's trying to show position to the center of datum B, which would make sense based on how it's drawn.
Is the feature control frame drawn incorrectly or is something off with my alignment?
Also, am i interpreting it correctly that each counterbore is datum C and each through hole's position must be checked to it's counterbore? If so, how can I change datum C in the middle of a program?
Any help is appreciated, thanks.
