I am looking for some guidance on the best way to check perpendicularity of a B datum hole back to A datum. The material is 1.6mm thick and the only thing I can think of would be to measure the B datum at 2 or 3 different depths then construct a cylinder. Am I wrong in thinking this callout is a little silly? I'm grateful for any advice you guys can throw my way.
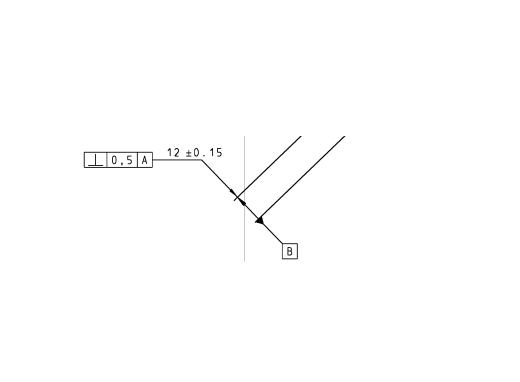
The perp tolerance seem to indicate that the toleranced feature isn't a line (no Ø symbol) or the tolerance only applies in one direction. Additionally, there is no Ø preceding the dimension 12.
This makes me wonder if the toleranced feature really is a hole/centerline. It "looks" more like perhaps a surface that is toleranced?
Could you show us more of the drawing? Like showing the hole and datum B?