hexagon logo

PC_DMIS GEAR Alignment

Hello all,

 New to PC-DMIS and PC-DMIS GEAR maybe a few months in. I have run into some issues with the alignment in GEAR. I have an external spur gear When I load the files into gear for the alignment, probe, and measurement routine and run the alignment it asks for 3 points on the plane and 3 points in the gears bore then 1 point left side of tooth one and 1 on the right tooth 1. once thats done it goes into DCC and does the plane and bore then touches a point on the major of a tooth and then tries to travel on that plane through the gear to touch off on the root. I have tried to create my own alignment to bypass the generated alignment however I keep getting z axis errors. I do the same call outs on my manual alignment  3 pts on a pln 3 pts on bore circle. Anyone know what is needed for the "initial imported alignment" file or what would make the program try to move through the gear? Is there something with CAD that could be an issue? I appreciate any help.

  • my immediate gut feeling would be somehow youre either not setting your LEVEL correctly or you don't have a CLEARPLANE defined. 

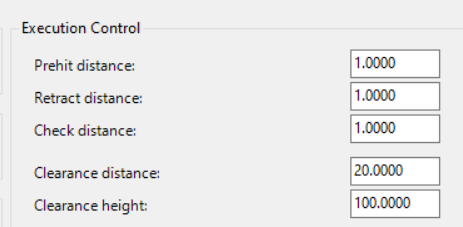
  • Have you checked the Execution controls in the alignment dialog?  These control the clearance parameters and more.

    Assuming those are valid, try to check the alignment.  Tell Gear to leave PC-DMIS visible. After the manual alignment, cancel the execution.  Gear will have created a measurement routine for the alignment.  Open it and place the cursor after the manual alignment.  Now move the active probe tip over the center of the gear, and see if the XY values are close to 0,0, and Z should reflect the height above the datum plane.

  • How many points did you take on the plane?

    Instead of a circle, create a cylinder.

    Have you kept the basic rules of alignment? Level - Rotate - Origin?

  • Hi Don,

     the execution controls are good. I checked the active probe over my 0,0,0 and the readout reflects correctly. I think where I am messing this up is the files loaded into gear. Thank you sir

  • I did a cylinder and set up the alignment but the gear software rewrites over it and it takes out any adjusted movements. I'm not sure what im doing thank you all for your help.

  • The end result of the "automatic" Gear alignment routine is really just an ALN file, same as would be created from PC-DMIS.  If you want to write your own alignment routine, just save the alignment to a named ALN file, outside of the Gear application.  Then skip the alignment tab and use the execute tab to recall that ALN file you just created

    Alternatively, if you've created a routine for alignment and don't want it over-written, just disable the "Generate" button in the alignment tab and execute your alignment

  • Can you share your alignment program that you tried to manually use?  

    I have always preferred writing my own program to align to the gear.  I use a plane, level to it, measure my circle, set my origin on a circle, then take the hits on the tooth(OD) or gap(ID), followed by a midpoint, then rotate from the circle to the midpoiunt.  For the DCC measurement, I usually repeat the midpoint section 3 times, with the thought that each one gets a little bit closer, to wipe out my poorly measured manual tooth measurements.  

  • Thank you I believe I have figured it out. I was not creating a newly named alignment file once created. So I was essentially overwriting my .ALN file every time I tried to run the program. I had to figure out the correct way to utilize the folder drop boxes. However Matt I am interested in how you set up your alignments for gears as you explained. For my manual alignment I use a plane and a cylinder not sure if that is necessary same for my DCC aln. I have no clocking points in my program but I generate them from the alignment tab and it runs a series of touches on the tooth. Once that's generated that's what I use as my measurement alignment. I feel like this may not be the most effective way to align the gear but it is how i was able to successfully run my measurement routine. I am open to any tips and help. I am working with assemblies that have either splines or teeth so creating my own alignment will be the most effective. Thank you all for the help!!