hexagon logo

Iterate and Repierce Problem in GeoTol Profile Dimension

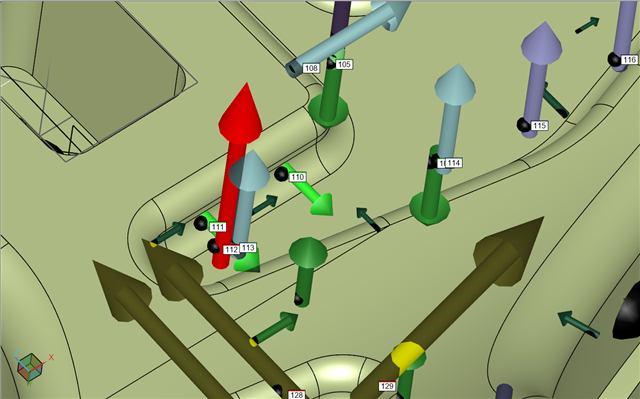
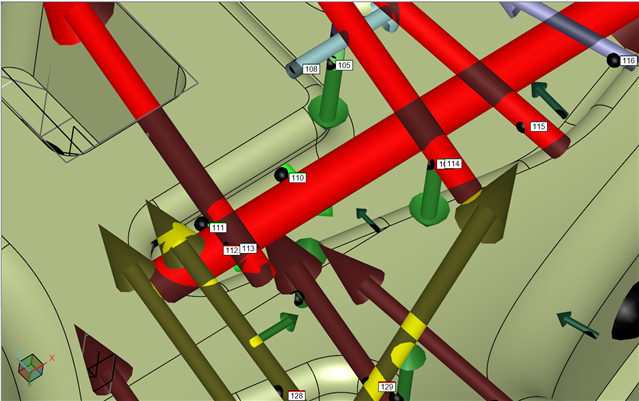
I've come across a problem with a profile dimension on a part with a large amount of deviation on the measured surface.  The measured point is close to a perpendicular surface.  The deviation is so great that the measured point is closer to the perpendicular surface than the measured surface.  With iterate and repierce enabled in the nominals tab of the profile dimension the deviation arrow is normal to the adjacent perpendicular surface and not the measured surface.  With iterate and repierce off the arrow is along the probed vector.

Is this normal behavior that I should have recognized when I first saw it, or is this an error with iterate and repierce?

Correct vector arrow, iterate and repierce disabled                 Incorrect vector arrow, iterate and repierce enabled
Parents
  • This is a limitation of iterate and re-pierce.  Generally iterate and re-pierce improves the accuracy by finding the nearest nominal on the CAD surface for each measured point.  The exception is for cases like this where there is excessive deviation.

    It looks like you are measuring multiple vector points and then constructing a set for the profile.  In this situation, when the deviation is so bad that the actual measured points are no longer over the correct CAD surface, turning off iterate and re-pierce in the geometric tolerance command is the solution - the points will then use the nominals obtained for the vector points when they were created.  Scans have a similar problem when "find nominals" is selected but, with scans, there are more options available - you can specify a find noms tolerance,  select use "only selected" surfaces and "Use BestFit".  If you have scanned with all of these options enabled then there should be no need to find the nominals again when dimensioning so, again, iterate and re-pierce can be disabled in the geometric tolerance command.

Reply
  • This is a limitation of iterate and re-pierce.  Generally iterate and re-pierce improves the accuracy by finding the nearest nominal on the CAD surface for each measured point.  The exception is for cases like this where there is excessive deviation.

    It looks like you are measuring multiple vector points and then constructing a set for the profile.  In this situation, when the deviation is so bad that the actual measured points are no longer over the correct CAD surface, turning off iterate and re-pierce in the geometric tolerance command is the solution - the points will then use the nominals obtained for the vector points when they were created.  Scans have a similar problem when "find nominals" is selected but, with scans, there are more options available - you can specify a find noms tolerance,  select use "only selected" surfaces and "Use BestFit".  If you have scanned with all of these options enabled then there should be no need to find the nominals again when dimensioning so, again, iterate and re-pierce can be disabled in the geometric tolerance command.

Children