hexagon logo

inserting multiple comments at once...

Afternoon, 

I was wondering if you could insert multiple COMMENT/REPT at a time?

for example:

COMMENT/REPT,
1 G-7 Hole Dia. .120 +/- 0.005
COMMENT/REPT,
1 H-6 Location .470 BASIC
COMMENT/REPT,
1 A-6 Location 1.469 BASIC
COMMENT/REPT,
1 G-7 |POS|Dia. .014(M)|A|B|C| Noted
COMMENT/REPT,
1 G-7 Depth 2.245 +/- 0.015
COMMENT/REPT,
1 G-7 Counterbore Dia. .159 +/- 0.002
COMMENT/REPT,
1 A-3 |POS|Dia. .006(M)|Dia. .120| Noted

After they are inserted I go back and add the actual dimensions in between.

I can fill them out 1 at a time, but that is slow and very tedious...

thank you much!

Parents
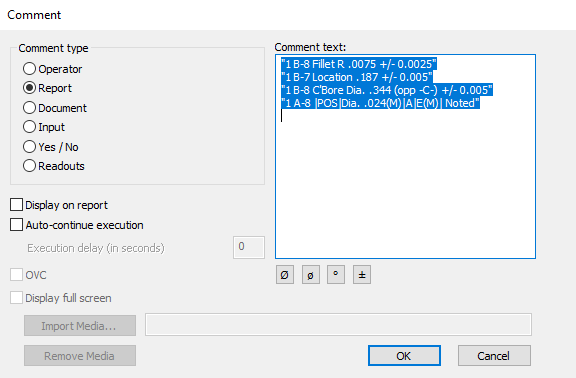
  • you will eventually encounter a string limit, but if you just encase each line within quotes, it will produce each comment on its own line within the report.

    COMMENT/REPT,
    "1 G-7 Hole Dia. .120 +/- 0.005"
    "1 H-6 Location .470 BASIC"
    "1 A-6 Location 1.469 BASIC"
    "1 G-7 |POS|Dia. .014(M)|A|B|C| Noted"
    "1 G-7 Depth 2.245 +/- 0.015"
    "1 G-7 Counterbore Dia. .159 +/- 0.002"
    "1 A-3 |POS|Dia. .006(M)|Dia. .120| Noted"

Reply
  • you will eventually encounter a string limit, but if you just encase each line within quotes, it will produce each comment on its own line within the report.

    COMMENT/REPT,
    "1 G-7 Hole Dia. .120 +/- 0.005"
    "1 H-6 Location .470 BASIC"
    "1 A-6 Location 1.469 BASIC"
    "1 G-7 |POS|Dia. .014(M)|A|B|C| Noted"
    "1 G-7 Depth 2.245 +/- 0.015"
    "1 G-7 Counterbore Dia. .159 +/- 0.002"
    "1 A-3 |POS|Dia. .006(M)|Dia. .120| Noted"

Children
  • thank you for your reply's!

    I always worry that I come across as a jerk on forums. So if I do, I am very sorry!

    but I Couldn't seem to get that to work =/

    I don't normally use this, I usually copy n paste the comment/rept, a few hundred times, then copy past each dimension line over...

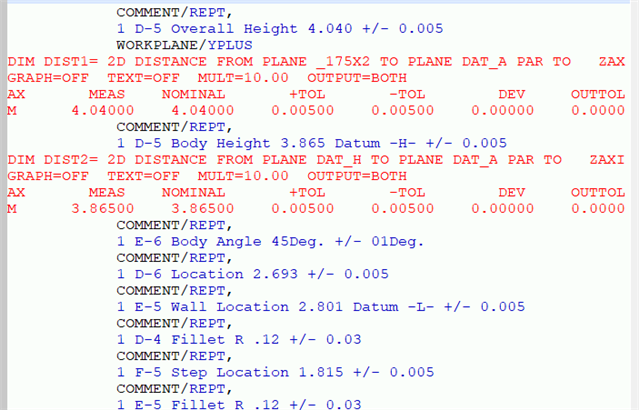
    just to make sure that I am explaining what we have set up the best that i can, here is an example...

  • Ok i get it, so you are producing a note, explaining what each dimensional feature is, which you then insert the dimension between each comment, after the fact.

    With your current reporting strategy, no matter what path you take, you will be stuck typing in the print's specific zone and dimensional control.  There's just no avoiding that.

    Respectfully, it seems a bit redundant to type all that in. 

    Can't you just "ballon" a drawing with each feature being represented by a bubble containing a numerical value... Then use the dimension ID's as numerical identifiers, let the actual dimension's controls dictate nominal +/-tol's etc.  That is kind-of industry standard practice (AS9100 etc) for FAIR reporting.

  • I use bubble drawings, and my reports match the bubble numbers from those drawings.  I still add text between each item describing the bubble number and the reported dimension.  I'm not the only one reading my reports.  Doing this makes it easier for someone else to understand what the report is saying.  It can be difficult to understand where one dimension begins and another ends when you have never seen a report before.

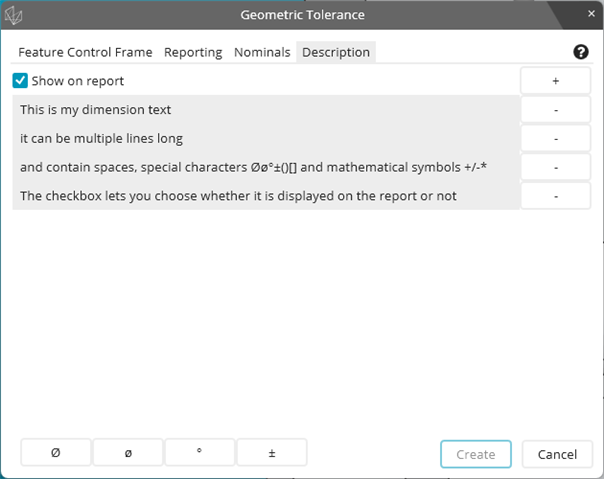
  • If you're using PC-DMIS 2023.1 or newer, you could use the Geometric Tolerance command's dimension description text instead of report comments...

    You'd still have to type in the text each time you create a dimension but it's one less step than creating separate dimensions and comments.

  • You sir are a saint. 

    I also had similar problems with trying to explain reports. We eventually settled on the "use the FAI balloon numbers" method at my last job. 
    If there is some confusion about where dimensions start and stop (which is a real concern) you could just use a blank report comment as a separator, then everting will be essentially double spaced on the report which should remove confusion. Also naming each dimension "bubble #1, bubble #2" should get them the rest of the way there. If not, perhaps some individual coaching would alleviate the need for that large amount of work on your part. 

    Currently every page of my reports has a snapshot containing only the relevant data points on the model for the associated dimensions. The engineers like it that way and the company wants them to be happy, regardless of the extra time investment. It also makes a for a very clean and clear report, and I never have to answer questions about "where did you take that point" because they can see it in the image.