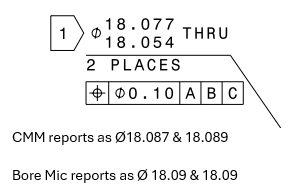
Bore Mic - 3 point contact.
CMM - at least 12 points using least square calculation method.
Which is correct method?
Your Products have been synced, click here to refresh

Bore Mic - 3 point contact.
CMM - at least 12 points using least square calculation method.
Which is correct method?
For what it's worth, back in the machine shop days we found that the best way to replicate a 2 point bore gage was to use maximum inscribed coupled with circularity. That would tend to show the maximum and minimum results you could find with a bore gage.
Sadly, we also found the best way to get the CMM to regularly agree with bore gages was to take every 3 point bore mic and lock them in a closet.
They are great tools, but they also hide flaws that are easily picked up with even a cheap bore gage.
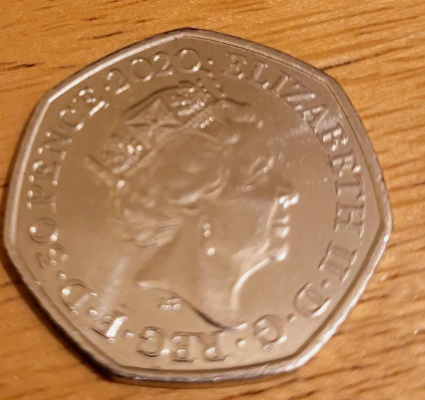
2-point checks have limitation also. You can completely miss tri lobing for example, which exactly the type of error a 3 point bore mic is designed to detect. To illustrate this point, back when I used to train customers, I liked to ask them to measure the form error of a 50 pence coin using a micrometre or calliper. Since those are 2-point measurements, the results would indicate that the coin was almost perfectly round, whilst you can clearly see that it is not.

1: Both are OOS failing, so who cares about the 0.003 delta?! They both verify parts are bad, well beyond each devices' uncertainty levels, and well beyond the delta you are seeing.
2: Use the technology to your advantage. Do a form plot to see where the CMM is picking up the high spot, or what kind of pattern the bore is exhibiting. My guess is, you will find that the diameter is likely smaller as bore gets deeper, which is indicative of tool wear. Which is a very logical reason for the smaller diameter. Your bore mic can measure bigger very easily if you're not perfectly square to the bore's axis.
3: The CMM should be more reproducible than the bore mic. Human error is real. Do yourself a mini MSA and test out which one has lower measured variation.
In ISO world, none of them are usable for determining size. According to the ISO standard, the default method for determining size is the two-point method - unless otherwise stated on the drawing. This method does have it's own caveats though (see Neil's post) and might not be the "proper" method depending on the application.
It really depends:
1) I'm assuming a standard, which supports LSQ. If that's the case, the CMM would, in theory, be more correct.
2) CMMs are rarely the most accurate tools for diameter calculation.
3) However, it depends on form. The world's most accurate 2-point super-micrometer would report an equilateral triangular object as the same diameter at all points.
| © 2024 Hexagon AB and/or its subsidiaries. | Privacy Policy | Cloud Services Agreement |