hexagon logo

Trace Fields Input Variable Into Report Header

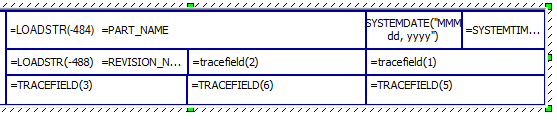
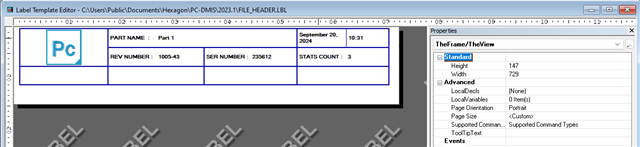
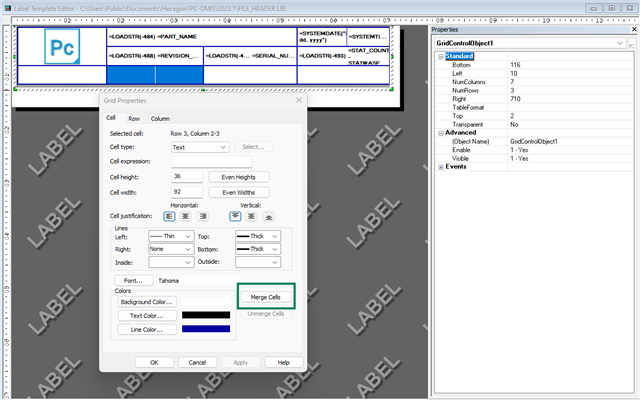
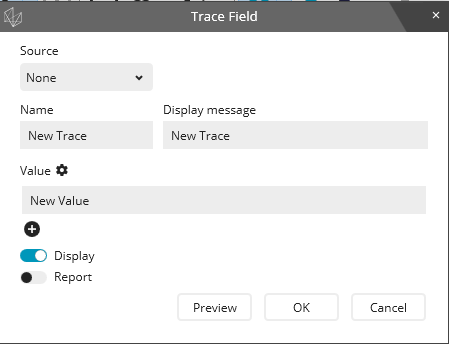
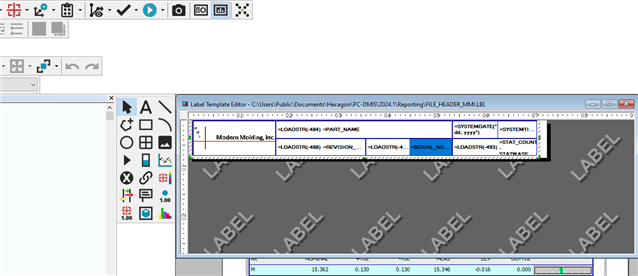
The last company I worked for would make create trace field commands to require inputs from an operator to be displayed in the report to actual custom file header template. It is a little tricky for me to navigate the label template header. I haven't been able to figure out much more than changing the image of the header. What is the best way to be sure a custom header would be displayed on all programs by default? I figured out a way but then when I updated PC-DMIS to 2024 it updated the defaults again so now I just change the template manually. I need to figure out how to match the variable of the trace field into the report header for inputs.


Spell check
[edited by: Austin Lee at 11:36 AM (GMT -5) on Sep 20, 2024]
  • If all of your reports are going to be like this, you can edit the file header label you have open, and save it with the modifications. 

    For Tracefields in the header of the report. They go in order from top to bottom, =TRACEFIELD(1) first tracefield in program, and so forth. In your example, if you want the tracefield to replace  SER NUMBER : followed by text, you will merge those 2 cells horitonzally

  •  Note that every time you update PC-dmis you have to replace the label template. I keep a "master" so all I have to do is copy and replace into the new versions folder. 

    File -> reporting -> edit -> Label template.

    select the "File_Header .LBL"

    when you edit the fields it should look something like this.


    Like William noted top to bottom. you may need to change the "no" to "yes" depending on how you input and display the info. Since we use a script that passes it all back as variables ours are all set to "no"

  • I got the trace fields to show up! I'm not following the part how to merge the trace field and SER NUMBER. In my case I would rather just remove the serial number and stat count and only use the 2 trace fields. Ncogneto I'm curious how did you add another row of box inputs on the report?

  • You can add rows via the property panel that pops up. Select "GridControlObject1", you will need to increase the size and need to reformat cell sizing and borders to make it look similar to the rows above it. Adding a new row will mess with the sizing of the original 2 rows as well, so you may need to play with it to get it how you want it to look. Attached image below to show properties tab and row added. If you want to keep them the same height. Default cell height value is 36, so you have to drag the middle resize handle to ~115 is what it took me for 3rd row to be 36 in height as well. But when I added in borders, the line thickness, that actually move the sizes around a bit. I got mine to look decent.

    To merge the cells you will need to shift + click the cells so that they highlight blue, and then right click them and in that pop up window, select merge.

    I saved the header label with 3 rows I just edited, and will attach it here as a .zip if you want to use it or review it.

    FILE_HEADER_3_ROWS.zip