hexagon logo

Profile tolerance

Hello,

I have drawing with a profile callout with a .004" spec. I am using PC-DMIS 2019 version.
My customer is measuring the part on Zeiss Machine.
The issue came up that they are able to spilt the tolerance to a +/-.002.
PC-Dmis, I am only able to enter the .004 using the "Exact Measure" option. I attempted the "Legacy" Mode this would not work either.

Is it possible to split the spec and have it read +/-.002, instead of the 0- 0.004?

Thanks,
Jim

attached is the drawing for reference

Attached Files
Parents
  • Thanks KIRBSTER for the response. This is the report the Boss wanted to see.

    What is the best way to measure this type of profile call out?
    I wrote program to take vector points or should I measure as circles and lines?


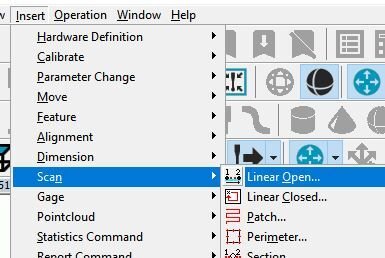
    Well I have a scanner, but I would suggest points if you don't have a scanner. You can still use Linear Open Scan, if you know how to use them with a Touch probe. Insert/Scan/Linear Open. If you don't have this, then points and make a constructed Feature Set out of those points.

Reply
  • Thanks KIRBSTER for the response. This is the report the Boss wanted to see.

    What is the best way to measure this type of profile call out?
    I wrote program to take vector points or should I measure as circles and lines?


    Well I have a scanner, but I would suggest points if you don't have a scanner. You can still use Linear Open Scan, if you know how to use them with a Touch probe. Insert/Scan/Linear Open. If you don't have this, then points and make a constructed Feature Set out of those points.

Children
No Data