hexagon logo

cribbage players

Any cribbage players on this site?  Just over a year ago I bought a CNC router mill for my upcoming retirement (to keep busy & hopefully make a little cash)

I have about 200 cribbage boards I have designed over the years and now I can make them much nicer and much more easily than hand drilling 240-480 holes

Since I have had the machine I have also designed up (and made) quite a few other things.  I really like the 3D 'carving' capabilities of this thing.

this is the machine I bought, along with a 3hp spindle, and a few of the other accessories.

nextwavecnc.com/.../

Parents
  • it is a fun game, perfect for long cold winters and nights at deer camp!

  • Many possibilities, you could offer some solid color hex blocks so it could be used as a map, or they can use the board to create smaller rooms. 

    Can you seal up the MDF to prevent it from sucking up water? Either from spilled drink or condensation rings from cold glasses. 

  • should be able to do that, a nice spray spar-varnish would seal it up tight, not sure what it would do to the size of the edges.  as for colored hexes, dip them in dye would color them nicely.  AND A POX ON ANY PLAYER WHO PUTS HIS DRINK ON THE GAME BOARD!!!!!!!  That rates right up there with touching the GM screen!

  • Not "on the game board" but next to the game board on the table will happen. We don't want the POX! 

  • back in the days when we played "Bushido Adventures in Samurai Japan" I made up a travel box (45 years ago or so).  Well, TWO travel boxes.  One for the Commodore-64 and printer, and one for my work surface.  My buddy ran the game, I wrote a BASIC program that would generate the random encounters (which ended up being called the DEATH MACHINE).  GM rolled for the random encounter, entered the numbers rolled through all the requirements, and it printed it out for him to use.  I made all the monsters (human and otherwise) a bit stronger, and number of them a bit larger, and it sped up game play enormously!  HUGE box, probably weighed 50 pounds with the PC and printer and an inch or so of the old dot-matrix paper in it.  It had removable legs and a power strip.  The other box was a table/dice storage system.  I kept my stuff on that one, so no chance of getting 'the pox'.  We used that for a number of years, then life happened, I progressed beyond the C64.  Eventually we started playing it again, but NO C64, so I made an Excel file that did the same thing.  Again, DEATH MACHINE label got applied to it!  His daughter is going to try to run the game now, she has the Excel DEATH MACHINE, and I also still have it, I even have it here at work!

  • You didn't lug a TV around, did you use one at his house or what? Well, I guess if you were super fancy you had the one with a lil screen on it? 
    When I was a kid we had a C-64 but it was just hooked to a tv. 

  • It hooked up to his TV, wasn't lugging one around!

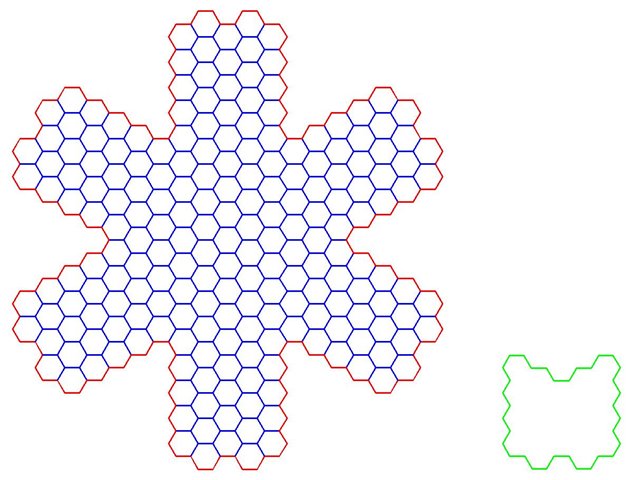
  • last night I designed up a 'play board' (battle board, whatever) to go along with the setup for the mapping board.  1" hexagons (again) but the over all shape is a hexagon, to 'match' the mapping hexagons, for encounters in each 'room' of the mapping board.  I won't need all the little hexes for building the map, just the laser lines for play.  BUT, it will need 'blockers' for blocking off each of the 6 areas that may or may not have a tunnel there.  the mapping hexes I made have 1, 2, 3, 4, 5, or 6 'arms', so I have to make blocker plates to block off any un-used arms of the hex, if ya follow.  13 possible hex layouts to cover all the possible options on the mapping board, so I will need 5 'blocker' blocks to cover.  Again, red is the pocket, blue is the laser lines.  the green is the 'leg' blocker

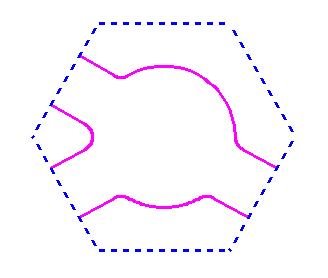
    sample tile for the mapping board, one of the 3-way options, dashed is the outline of the hex tile, purple is the laser path.

  • Can't wait to see some samples! 

    In last night's session my poor "pointy stick man" was almost a goner. And I wasn't even "at the table" (we are using Foundry) to see it! I stepped outside to check on something in the woods and came back to my poor dude with only 3hp left. 

  • I'm planning on making a small version of the mapping board, hopefully this weekend, using 1x12 stock (11.25" wide), so it will only be 10x11 hexes.  It should be a quick cut, and quick laser.  Then I will give it to my buddy for him and his daughter to use in actual gaming and see how well it works in play.

  • You could maybe capture some Starfinder players by doing a double-sided board with hexes on one and squares on the other. Some appropriately themed spaceships engraved around the rim probably wouldn't hurt either. 

    You are talking about some people like my former boss who spent $8k on a custom gaming table so price might not be too much of a concern Nerd

Reply
  • You could maybe capture some Starfinder players by doing a double-sided board with hexes on one and squares on the other. Some appropriately themed spaceships engraved around the rim probably wouldn't hurt either. 

    You are talking about some people like my former boss who spent $8k on a custom gaming table so price might not be too much of a concern Nerd

Children
  • well, I do have the square designed as well, and yes, designed to be on the flip side of the hexes...... thus the reason I said 1/2" MDF, 1/4" would get wobbly I think.  Hard board would be a possibility, but that stuff is pretty thin.

    as for custom designs lasered in, always as an extra-cost item! Smiley

    my daughter just this week got a cricut, so stickers is also a possibility.

  • Maybe some nice mahogany or something pretty as a boarder with the game board sandwiched in between. 

  • expensive, and I know the type of nerds that would frequent the 2 local stores I might be able to sell through..... (cheapskates)

  • Maybe some wonderful pine for the cheapskates then! Joy
    Cedar fence boards are cheap and can clean up nice....

  • yeah, I don't work with cedar (anymore).  years ago I made a cedar planter for the wife, then next day my hands looked like balloons, so, no, pass on cedar!

  • yah probably a good idea. Hard to code with balloon hands! 

  • had an idea for making the map board more 'stable', to keep the tiles from moving after being placed.  1/8"+ hole in the center of each tile, 1/8" hole in the main board, and using pieces of 1/8" dowel in the board to put the tile over.  lots of ideas, all need to be tested for feasibility.

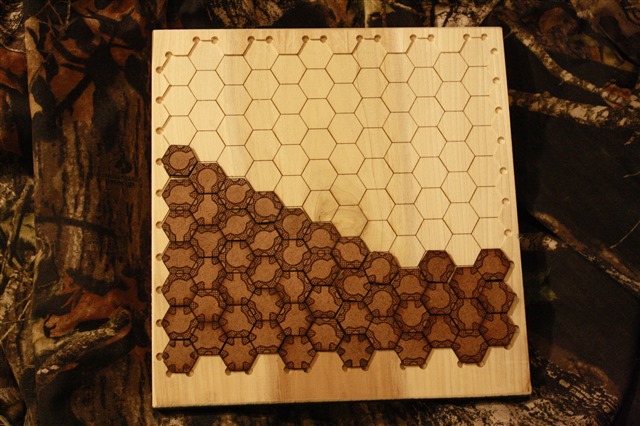
  • here is the small test version of the board.  12x12, hexes 1" across the flats, the tiles are made from tempered hard board.  tried to mill them out after laser burning the paths, that stuff doesn't mill for crap, so I then laser cut them out.  If this idea works out, the hexes will be 1/8" plywood hexes, precut into hexes from Amazon.  I do have some on order, but the 1" across the flats weren't from an Amazon dealer, just a shopfront, so it's going to take a week or so for them to show up.

  • That looks pretty sweet! love the color contrast. 

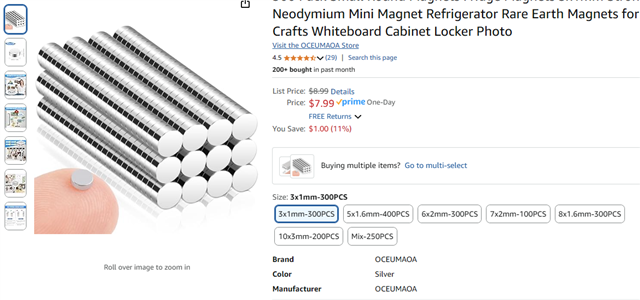
    If your drilling holes for retention, then magnets are the next logical step! And only require a bit of glue. 
    Also, it would probably make it so the tiles stack up for storage too. 
    Bigger magnets inserted from the back side of the board would keep the front looking sexy as well. 

  • yeah, that gets into WAY expensive for cheapskates.  lots of manual labor involved in that, pushing the price way up, up, up!

    (1) mill the holes for the magnets, twice as deep as they are think, plus some for glue.

    (2) ALL magnets must stack the same way (or all the tiles won't work in each location)

    (3) glue in the bottom of the hole, then a stack of 2 magnets in the hole (only the bottom touching the glue, hope it doesn't squeeze up at all!)

    (4) glue on the top of the top magnet

    (5) center the tile on the magnet, then let it all dry

    It would be 120 holes + 240 magnets just for that one I pictured.

    Yeah, that's a LOT of manual labor and a LONG time making any set up of size (say, 21"x21", the best side for my machine to give me a nice cleanup).

    Last night, after I shut off the machine, I started altering the tile file.  Like I said, the milling wasn't working, so I laser cut them out.  Well, they can be butted up touching to laser them, that gives 0.010" (roughly) spacing between tiles placed on the board, should work just fine, and it saves a lot of board.  I can get 2.7mm thick plywood where I get my normal wood, 4x8 sheet is $23, and I can get over 3600 hexes out of a sheet (1" across the flats) or 4800+ with 1" across the points.  I don't have any hex mats to see which way they are made, and that info isn't on Amazon!  It would take time to cut them, and I think I would like the whiter plywood over the darker hardboard.  But, I won't make any big units until the one I have is play tested, if it doesn't seem to be viable, then no point in wasting time & material.