hexagon logo

cribbage players

Any cribbage players on this site?  Just over a year ago I bought a CNC router mill for my upcoming retirement (to keep busy & hopefully make a little cash)

I have about 200 cribbage boards I have designed over the years and now I can make them much nicer and much more easily than hand drilling 240-480 holes

Since I have had the machine I have also designed up (and made) quite a few other things.  I really like the 3D 'carving' capabilities of this thing.

this is the machine I bought, along with a 3hp spindle, and a few of the other accessories.

nextwavecnc.com/.../

Parents Reply Children
  • yeah, I don't work with cedar (anymore).  years ago I made a cedar planter for the wife, then next day my hands looked like balloons, so, no, pass on cedar!

  • yah probably a good idea. Hard to code with balloon hands! 

  • had an idea for making the map board more 'stable', to keep the tiles from moving after being placed.  1/8"+ hole in the center of each tile, 1/8" hole in the main board, and using pieces of 1/8" dowel in the board to put the tile over.  lots of ideas, all need to be tested for feasibility.

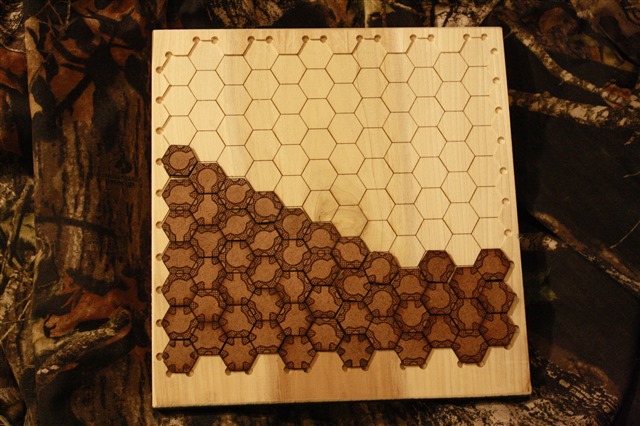
  • here is the small test version of the board.  12x12, hexes 1" across the flats, the tiles are made from tempered hard board.  tried to mill them out after laser burning the paths, that stuff doesn't mill for crap, so I then laser cut them out.  If this idea works out, the hexes will be 1/8" plywood hexes, precut into hexes from Amazon.  I do have some on order, but the 1" across the flats weren't from an Amazon dealer, just a shopfront, so it's going to take a week or so for them to show up.

  • That looks pretty sweet! love the color contrast. 

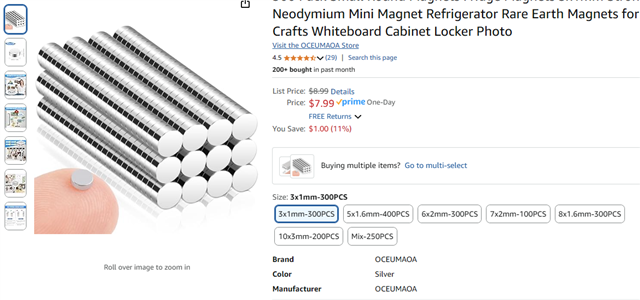
    If your drilling holes for retention, then magnets are the next logical step! And only require a bit of glue. 
    Also, it would probably make it so the tiles stack up for storage too. 
    Bigger magnets inserted from the back side of the board would keep the front looking sexy as well. 

  • yeah, that gets into WAY expensive for cheapskates.  lots of manual labor involved in that, pushing the price way up, up, up!

    (1) mill the holes for the magnets, twice as deep as they are think, plus some for glue.

    (2) ALL magnets must stack the same way (or all the tiles won't work in each location)

    (3) glue in the bottom of the hole, then a stack of 2 magnets in the hole (only the bottom touching the glue, hope it doesn't squeeze up at all!)

    (4) glue on the top of the top magnet

    (5) center the tile on the magnet, then let it all dry

    It would be 120 holes + 240 magnets just for that one I pictured.

    Yeah, that's a LOT of manual labor and a LONG time making any set up of size (say, 21"x21", the best side for my machine to give me a nice cleanup).

    Last night, after I shut off the machine, I started altering the tile file.  Like I said, the milling wasn't working, so I laser cut them out.  Well, they can be butted up touching to laser them, that gives 0.010" (roughly) spacing between tiles placed on the board, should work just fine, and it saves a lot of board.  I can get 2.7mm thick plywood where I get my normal wood, 4x8 sheet is $23, and I can get over 3600 hexes out of a sheet (1" across the flats) or 4800+ with 1" across the points.  I don't have any hex mats to see which way they are made, and that info isn't on Amazon!  It would take time to cut them, and I think I would like the whiter plywood over the darker hardboard.  But, I won't make any big units until the one I have is play tested, if it doesn't seem to be viable, then no point in wasting time & material.

  • I guess there is some labor involved... I would just make my kids do that part though Joy

    I asked the DM in discord which way they are.

  • 1" across the flats I guess, a 1" round base fits inside it on his game mat. 

  • thanks for the info.  I have designs for both ways.  the 1" across the points would make a smaller board, more hexes (obviously), but for just a mapping board would probably work, then do 1" across the flats for the play board, which would only be laser etching, no tiles.

  • had an interesting thought last night....

    IF I use that 2.7mm thick plywood to cut out the individual tiles, the SCRAP can be glued ON TOP of a piece of 1/2" MDF to make the boundaries, then no need to mill the MDF.  Put the MDF on the machine, put the plywood on top, then laser etch the paths on the plywood, then laser cut out the tiles, but going an extra pass deep and it will etch the hexes on the MDF at the same time.  You then have a white surface surrounding the map field, you have a dark un-mapped map field until you place the white tile on the board.