First, the word “linearity” has to be clarified.
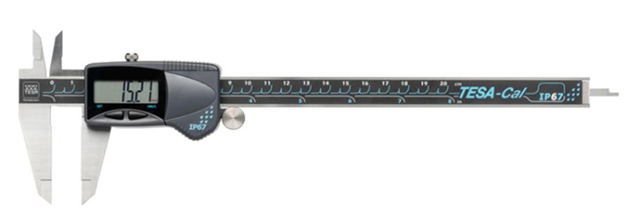
There is the “linearity” of a “measuring device”. Using this calliper as an example: features from 0 to 20 inches can be measured:
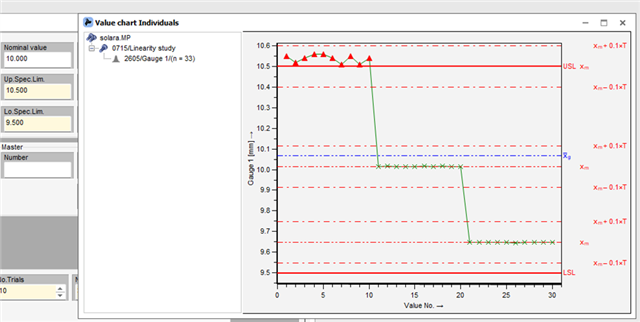
And then there is the “linearity” when measuring an individual feature, where you want to try to check whether a measuring device behaves linearly beyond the tolerance range and possibly slightly beyond it:
Both are referred to as “linearity”, but both require different considerations and requirements.
In general, a linearity is a “collection” of many “types 1”. Various references are measured repeatedly with their actual value according to the calibration certificate. So far, all linearities are the same.
The structure of the values screen is such that the reference value is on the left, and the repeat measurements are to be entered on the right:

The characteristic mask indicates how many reference values and how many measurements are available (there can also be several “reference values” if they are not calibrated normals, but the components have been measured on a higher-quality measuring device, and this may also be done several times)

Basic analysis
The value chart is showing each reference with the measured values:
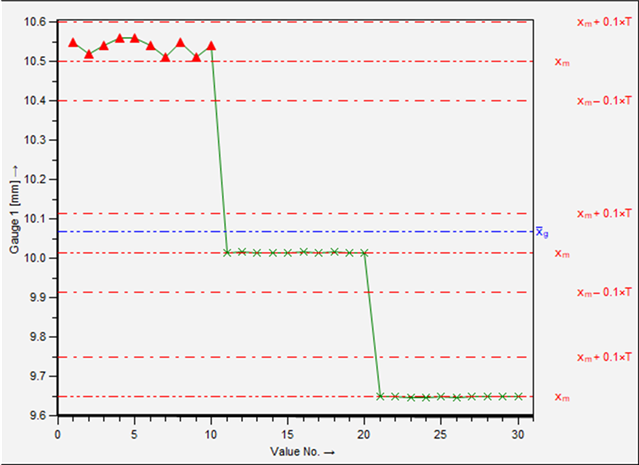
Two detail graphics are showing the results from the linearity graphically:
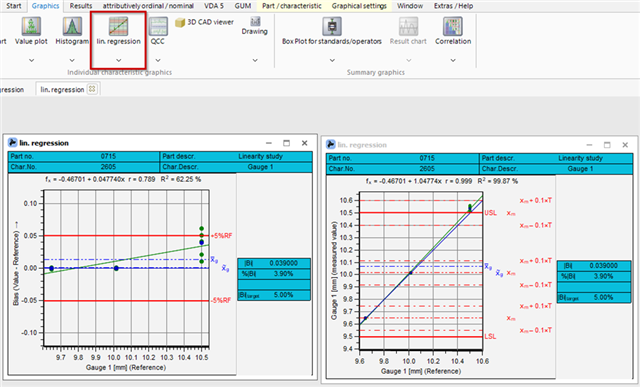
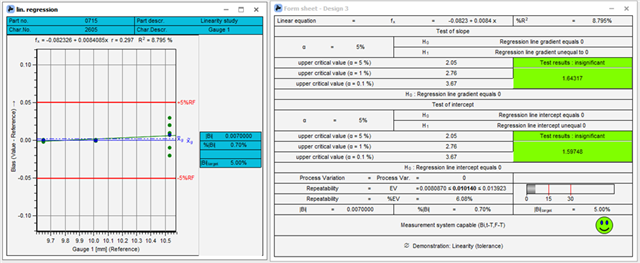
On the Form sheet most used results are combined. The Bias, (the difference from the measurements to the reference-value), as well as both tests for linearity (Test of slope and test of intercept).
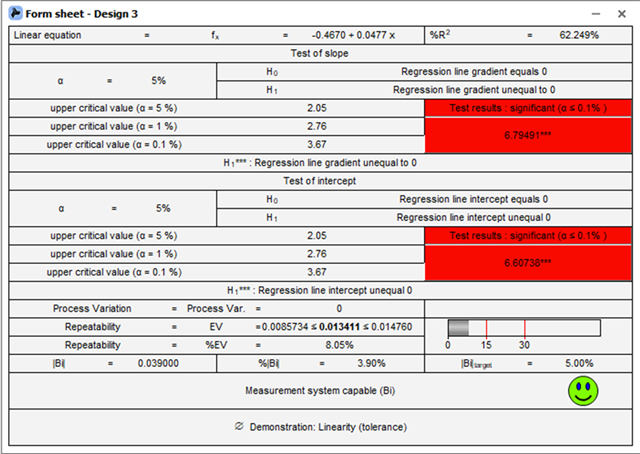
Next to the green smiley it can be seen, that this strategy only controls the BIAS, in % to the Reference figure (in that case, the tolerance).
What requirements should be used in which case?
The “maximum BIAS” can be used every time. This is the reason, why this is the default in the Q-DAS Strategies.
But if the Linearity is used to check the Linearity in a defined “specification limit”, the requirements should include the tests of slope and the test of intercept, as we have seen in the example, that on the upper specification limit that the reference value was not reached:
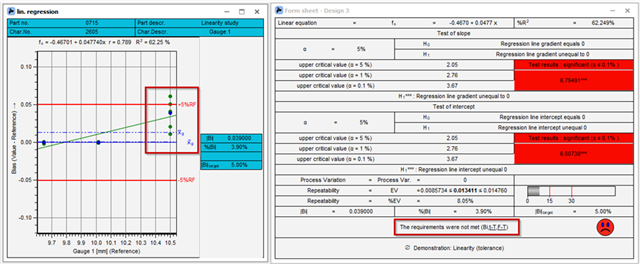
If the target value would be reached, the average of the measurement on the upper specification would reach the reference:
