Following through on a promise...
Last year in December, we promised that it will be possible to switch to HTTPS for Q-DAS Web applications soon. And here it is! The upcoming new Web version - or patch - scheduled for CW6 will make it possible. Details and official release information will be announced in the news block on our homepage.
Please note: New Web client installations with a respective https certificate from the get-go will need some little manual input / settings during the installation; upgrading or switching over existing Web-page installations from http to https will still take a bit more manual interactions and settings at the moment.
For future versions and installation patches and upgrades, faster and easier solutions with less configurations will be implemented.
For now, here is what is needed to make the switch for an existing Q-DAS Web-server setup:
Preparation by the customer's IT department
The Webpage, via IIS Manager, will require a respective Microsoft / Windows security certificate for your Q-DAS Webserver(s).
Even though possible, it is not advisable to use the "Self-Certificate" option. Even though a Self-Certificate is easier to retrieve and install, it will only as supported when using "Firefox" as Web browser. .
Web browsers "Edge" and "Chrome" are likely to require an "official" Microsoft Certificate within most networks, even internal "intranet" company internal networks and respective company internal security regulations.
Please note: Procurement and integration of the Security certificate are between you (or your IT department) and Microsoft! Hexagon and the Application Engineers cannot not offer any support in this regard as Hexagon is not the Certificate issuing party.
Also, side note: the default Windows Firewall ports are different for http (80) versus https (443) - but that switch is most likely the goal and already considered in many systems.
Settings in the IIS and in the JSON files
The certificate is issued for a specific "name" of the server.
If the web client has not yet been installed, it is recommended to use exactly the address as requested in the certificate (short server host name or fully qualified DNS host name) during the Web-client installation on the server.
For new installs, the DNS host name entry entered in the respective prompt during the Web client installation - and hopefully matching the certificate - will do the trick.
In case of an upgrading existing Web client installations / switchover to https:
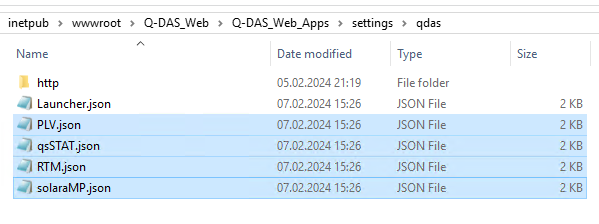
where the Web client has already been installed on the server, the addresses in the following 5 *.JSON files must be adapted: Please stop the Windows World Wide Web ... Service / Web-Service in IIS Manager before making manual edit in the *.JSON files.


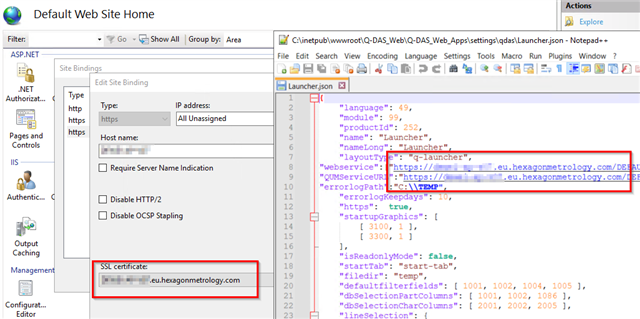
Respective SSL must be activated in the IIS:

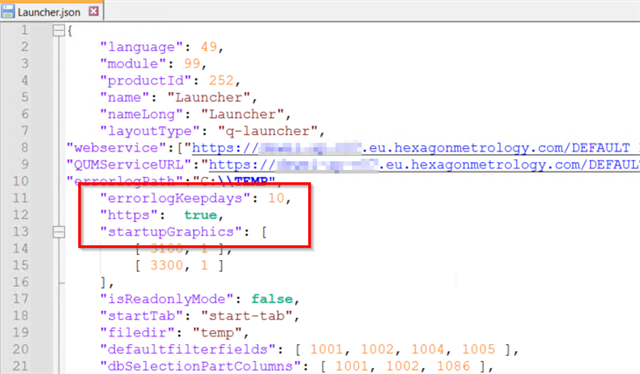
In addition, the Launcher.JSON file needs to be modified. Set the "https" entry to "True" as shown below. If the entry does not exist (due to an older version), please add it manually in the respective spot.

Required updates in all *.JSON files of the web products:

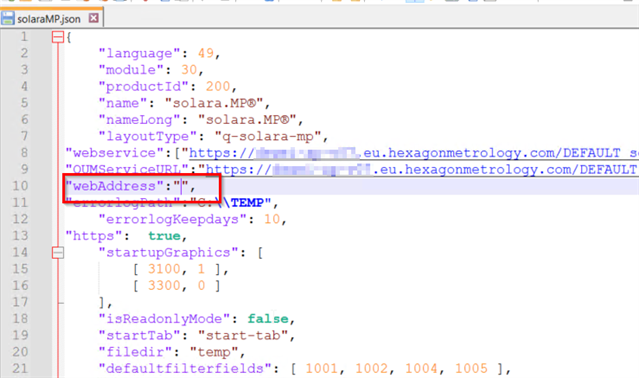
Any possibly existing entries in "webAdress" must be removed, or rather "blanked out" for content, as shown below:

